


Introduction
Grat here! these are my notes, and a rewrite of them into a walkthrough. on how I made a pixelart live2d model.
but like im dumb and stuffs, so maybe not everything here is usefull. even though this should get you a result close to what i made!
Note: notes are under/after The Walkthrough
The Walkthrough
Start by making a basic model, just like you would every other live2D model with overlap and layers in folders in folders
-
-
double check that they all have overlap, when imported into the editor the places without overlap and just layer separation, will have a thin white line where they meet
-
-
now check if the head does look to the sides like they should. (in Aseprite btw) like these two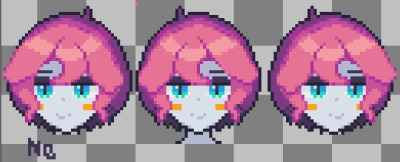
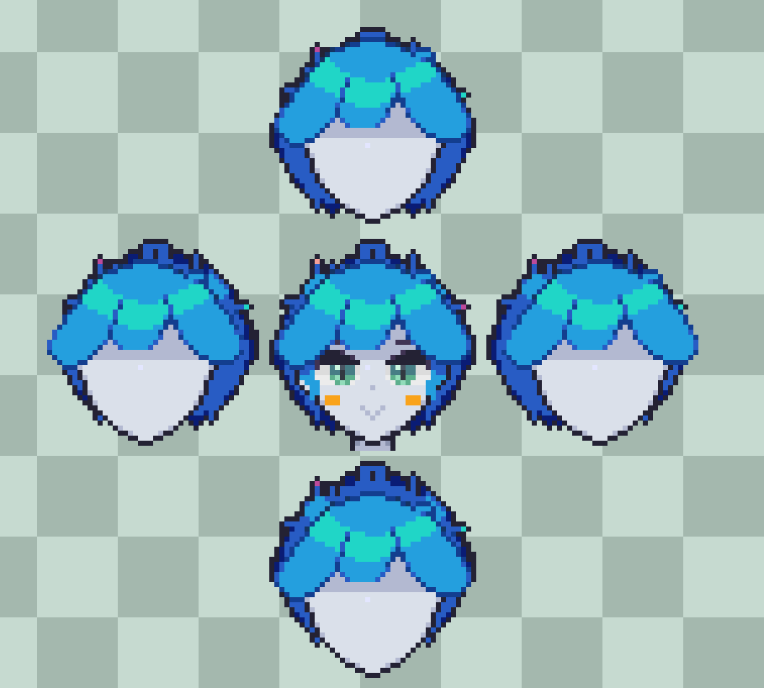
is the real life
-
now we should make a grid of pixels in a dithering this goes over the whole model canvas, and is set on the top of the layers, preferbly outside any folders (see image)
-


the model after dithering it over (but like make the pixels non transparent, you can do that in live2D)
-
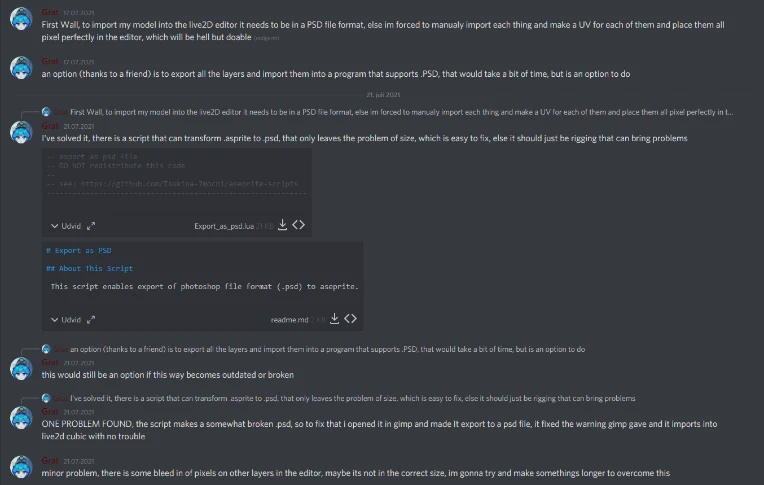
now after making a backop, inside aseprite go into Sprite/Sprite Size and resize it by 5000% (this is amount seems to make the least amount of bleed in from acent pixels)
-
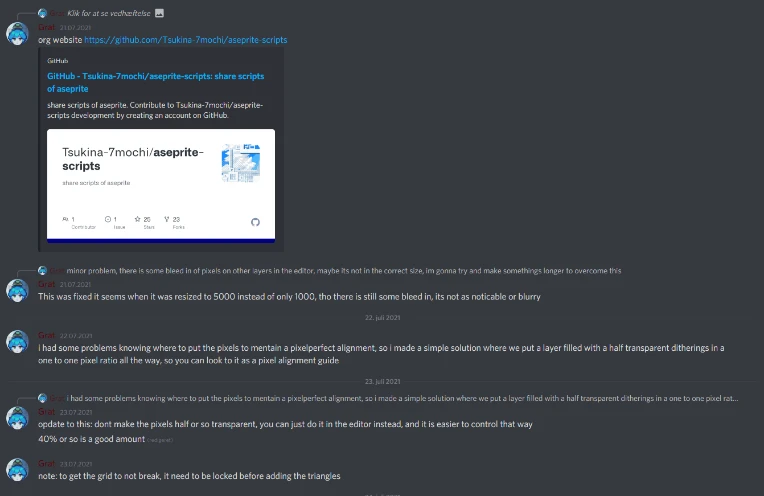
now after downloading this script for aseprite here: link :> (you need the .psd export)
-
-
you go op into File/Scripts/Export as psd in aseprite, this after a Looong time, (it will freze btw, its working just let it be) then a Broken .psd file is created
-
why its broken i dont know, maybe the script is outdated or made in a way that doesnt work as well anymore (live2d wont accept it) : /
-
now you open the broken .psd in gimp (or another program that accepts and exports .psd) and export it fixing the .psd (gimp will come op with an error, just ignore it)
-
-
this .psd can now be imported into live2d by dragging it over the application from your file-directory or desktop do this
-
-
now before you make the artmeshes you should go and lock the Pixel Grid at the top of the folder or outside it, and unlock everything that should have artmesh (which should be everything that isnt to guide?)
-
-
the pixel grid is probly quite anoying rn, since its just a lot of pixels dithered over everything, so go unlock it and put its opacity to your liking (i use 40%)
-
-
now you should make the head like the looking to the side head you made in aseprite.
note: there are parameters (in the parameter tab) that is named front hair and so on, use those
the eyes, the brows, the mouth all have parameters in the tab too
-
-
on the eyes they should fade out and in for the diferent sprites for half closed and closed and open, this can be done though the keyframes just like movement like this
-
Note: moving the head to the side may break the effect so go and check that is works while looking to the sides
-
-
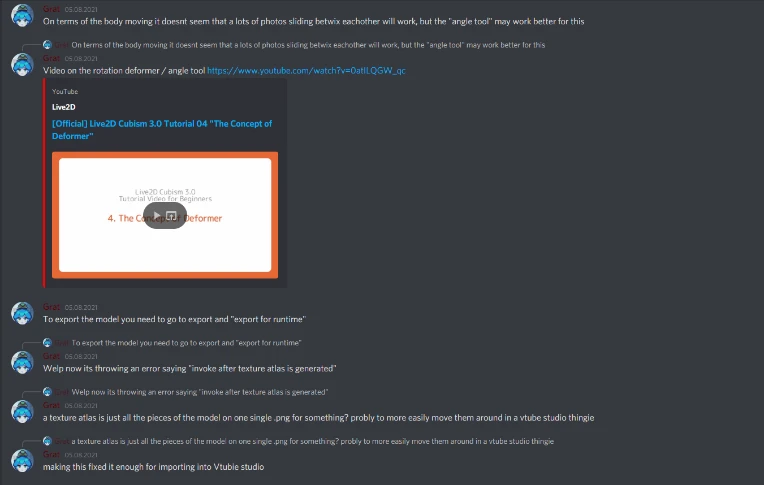
when the whole head is done, then we should start making it able to tilt down by the neck
Video on the rotation deformer / angle tool link here
-
-
at the top of your menus there should be a symbol like this, this is the "rotating tool" it places a thing that angles the thing its connected to

it looks like this
-
-
start by selecting only the things on the head, and all of the head. then you click on the button above, and it should "spawn in"
-
-
to move it down to the neck we need to click a smol dot inside the cirle, hold CTRL and left click, to drag it, then just place it between two pixels if its even or in the middle of one if its uneven
-
now double check everything if you feel the need
-
-
now I needed to make a texture atlas and you prob need to too
this button should be on the top of the menu like the "rotate tool"

click it and if should just make a atlas, there may be some pieces in the sides it haven't put in, just select them and say import or whatever, then make it do a Autonmatic layout (at the top)
-
-
then just click OK at the bottom of the pop op screen
-
With ALL THIS, it should be able to be exported for live2D studio
to export go into File/Export for Runtime/Export as moc3 file
-
-
then the folder it goes into should be imported into the studio (like a folder with a folder with the png atlas, and two lose .json files outside of the folder with the atlas)
-
-
then it should promt it to import and ask if it you want it to make the params work or something, say yes
-
-
then if you have face tracking set op, it should* work
the result should be somewhat like what i got out of it :>
-
-
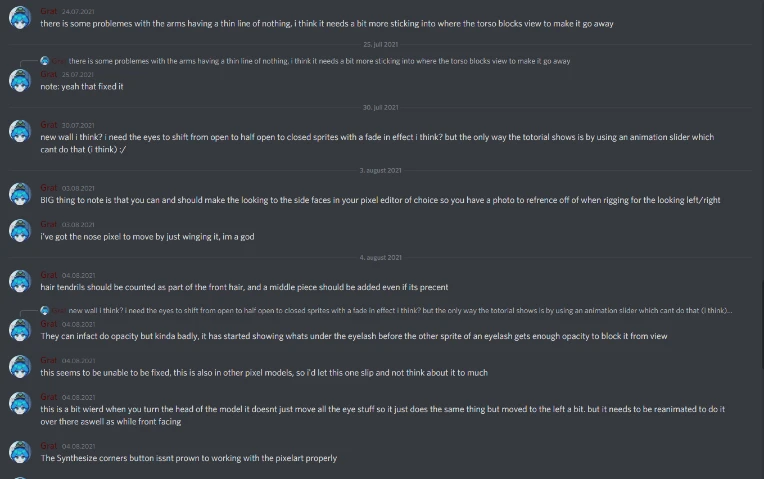
The Loose Notes
from when i first tried and was testing things out

Thats the notes :>
Thanks for reading this Thing i guess hope some of it was useful ! !